


Are you experiencing connectivity issues with your Xfinity router and need to enable the 2.4 GHz frequency band for better coverage and compatibility? The 2.4 GHz band can offer increased range and better penetration through walls and obstacles compared to the 5 GHz band. In this comprehensive guide, we'll walk you through the process of enabling the 2.4 GHz frequency on your Xfinity router, ensuring you can optimize your wireless network performance effectively.
Related posts:
how to connect ps5 to hotel internet
Understanding the Importance of Enabling 2.4 GHz on Your Xfinity Router:
The 2.4 GHz frequency band is commonly used for Wi-Fi connections and is suitable for devices that require longer-range coverage or have lower bandwidth requirements. Enabling the 2.4 GHz band on your Xfinity router can be beneficial for ensuring reliable connectivity across a wider area and compatibility with older devices that may not support the 5 GHz band.
Steps to Enable 2.4 GHz on Your Xfinity Router:
Access the Router's Admin Panel: The first step is to access the admin panel of your Xfinity router. You can do this by opening a web browser on a device connected to your Xfinity network and entering the router's IP address in the address bar. The default IP address is typically "10.0.0.1" or "192.168.1.1".
Log in to the Admin Panel: Once you've entered the router's IP address, you'll be prompted to log in to the admin panel. Enter the username and password associated with your Xfinity router. If you haven't changed these credentials, the default username is often "admin" and the default password is "password".
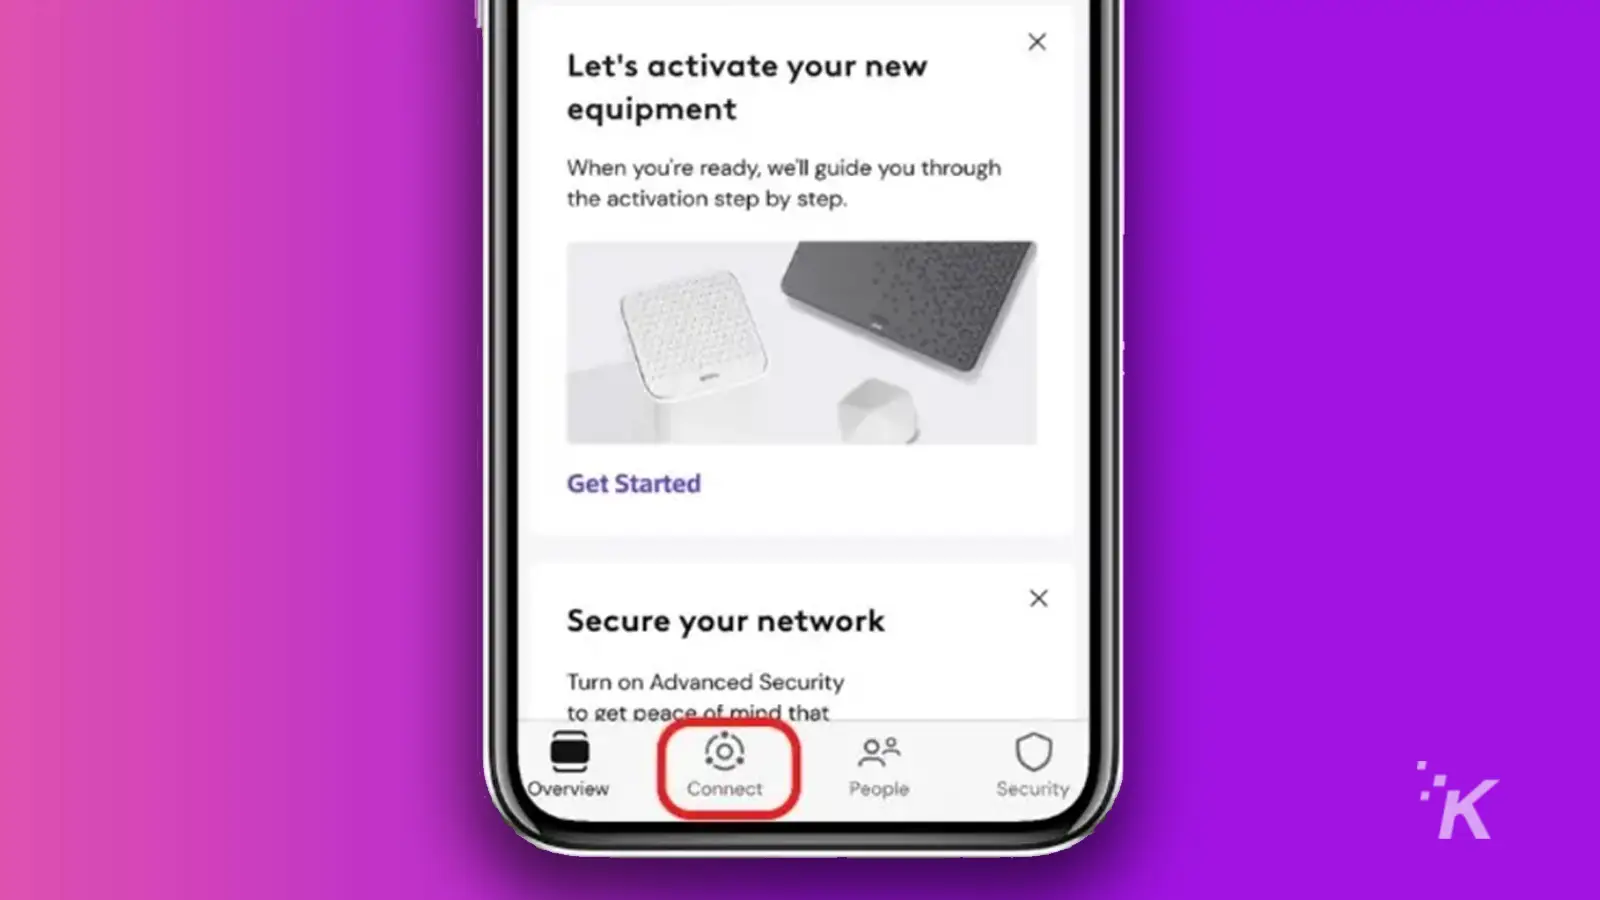
Navigate to Wireless Settings: After successfully logging in, navigate to the wireless settings section of the admin panel. This section is where you can configure the wireless networks broadcasted by your Xfinity router.
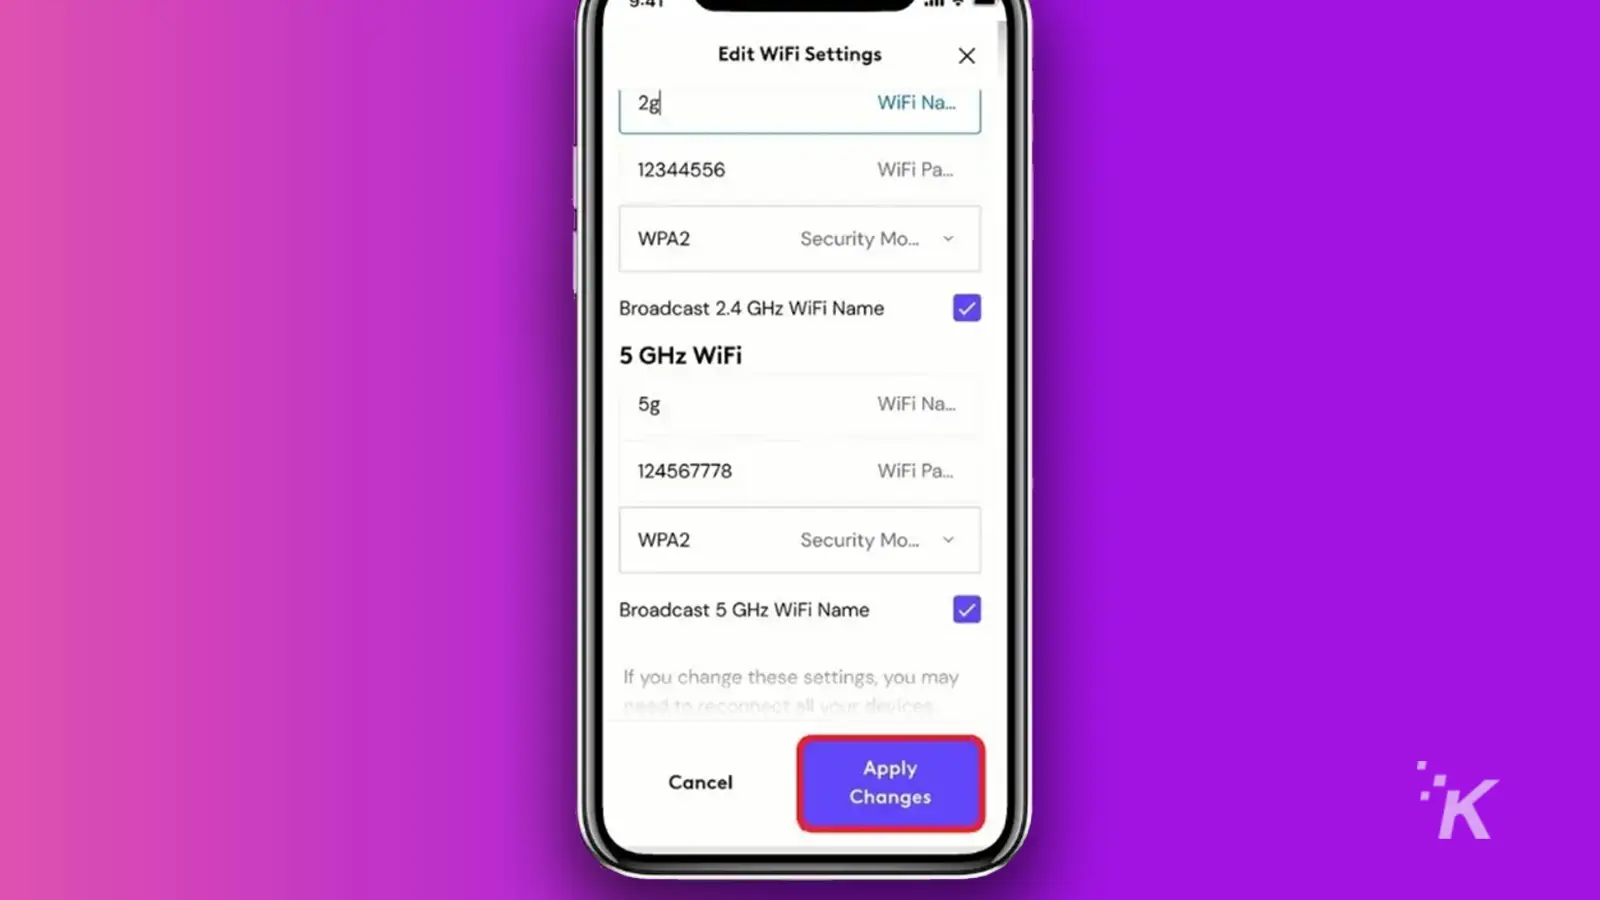
Locate the 2.4 GHz Network Settings: Within the wireless settings section, look for the option to configure the 2.4 GHz network. This may be labeled as "2.4 GHz SSID," "Wireless Network (2.4 GHz)," or something similar, depending on your router model.
Enable the 2.4 GHz Network: Once you've located the 2.4 GHz network settings, you'll typically find an option to enable or disable the 2.4 GHz band. Select the option to enable the 2.4 GHz network, and save your changes.
Configure Network Name and Security Settings (Optional): After enabling the 2.4 GHz network, you may have the option to customize the network name (SSID) and security settings. You can choose a unique SSID for the 2.4 GHz network and configure security settings such as encryption type and password to ensure a secure connection.
Save Settings and Reboot the Router: Once you've configured the 2.4 GHz network settings, save your changes and reboot the router to apply the new configuration. Allow the router a few minutes to restart, and your 2.4 GHz network should now be active and available for use.
Conclusion:
Enabling the 2.4 GHz frequency band on your Xfinity router can provide improved coverage and compatibility for your wireless network. By following the step-by-step guide outlined above, you can easily configure your Xfinity router to broadcast on the 2.4 GHz band, ensuring reliable connectivity across a wider area and compatibility with a variety of devices. If you encounter any difficulties during the process, refer to the router's user manual or contact Xfinity customer support for assistance.